Food Blogger Tips: Google Recipe Search

This only applies if you write recipes online and care about how many people visit your site. Otherwise, move along.

About a fortnight ago, Google released Recipe View in the US and Japan, a new way to trawl through their index for food preparation. When searching for a recipe online, most people type one or more of the component ingredients then hit the search button, which ends up with poor results. Most people who type “turkey” into the maw of Google don’t want to know what or where turkey is, just how to appropriately deep fry one. For example, the spike in searches for turkey on Thanksgiving isn’t the result of a seasonal interest in Byzantine vacations.

So to rectify this parlous state of affairs, they released Recipe View.

The practice of displaying rich snippets of information in Google search results has been around for about two years, so it was only a matter of time before it came to recipes and food blogging. The problem at the moment is that most of the results for Google Recipe View are trash: they’re stacked with the big recipe sites that scraped a good deal of their early content from the old Usenet archives because smaller sites (and most food blogs) don’t use the hRecipe format unless they’re run by an interminable data nerd.

What to do about it.

If you do write recipes and you use Blogspot, it might be a good time to consider your options. If you happen to use , I recommend the freshly-released Recipe SEO plugin or the older, and slightly less user-friendly hRecipe plugin. They’re both simple to use to appropriately format your content. With any luck (and the impending global rollout of Recipe View), you’ll pick up a few readers who would otherwise miss you.

4 Ingredients

Thanks to the Twitter procrastination pipe and Ed Charles, I recently became aware of the 4 Ingredients cookbook and associated television show. After the unshakable rage and bewilderment had subsided on my first viewing, I realised that it should be me profiting from people’s inability to not only cook but select appropriate means of learning to do so, rather than a pair of nasal blondes from the Sunshine Coast.

Their recipes seem thoroughly random; the sort of thing that a 6 year old would concoct to impress a parent on their birthday, picking ingredients from what was at hand in the average middle class fridge and combining with gay abandon. Yoghurt, cornflakes and chicken, together at last.

No, seriously.

How could the public be so easily duped?

So I present to you the 4 Ingredients recipe generator.

Press reload for more recipes. Press it one hundred times to generate your own bestseller.

Press reload for more delicious 4 ingredient recipes!

Addendum: Sorry, I mixed up Ed Thomas with Ed Charles

How to make coconut milk

I make my own coconut milk. It tastes nuttier and richer than that from a can, and frankly, I enjoy spending vast amounts of my spare time preparing food. Most recipes for making milk mention grating up the coconut or extracting the white flesh with a zester or fork – but it is much faster to pulp the flesh up in a blender.

how to make coconut milk

You’ll need a hammer, a clean cloth, a blender and an old brown coconut.

how to make coconut milk

In his book Thai Food, David Thompson recommends cracking the coconut open with the back of your heavy cleaver but a hammer is much more efficient and satisfying, with the added bonus of not risking losing an ear. Whack the coconut with the hammer until it cracks open. Let the juice inside run out and discard (or drink it, if you’re into sour coconut water).

how to make coconut milk

Opened.

how to make coconut milk

Peel out the white flesh using a knife or a spoon. There is a thin and woody brown membrane that coats the flesh, the testa.

how to make coconut milk

Cut it off.

how to make coconut milk

Continue until you’ve separated the brown parts from the white. Place the white flesh into your blender along with about two cups of warm water. Blend until thoroughly shredded.

how to make coconut milk

Pour the shredded mix into the tea towel or clean cloth.

how to make coconut milk

Squeeze out the milk. I’d do this with both hands, but my other one is holding the camera.

how to make coconut milk

Let it settle. The thick layer on top is coconut cream, the thinner milk is beneath.

French Fry Coated Hot Dog On a Stick: The Recipe

I shouldn’t be left unattended in the kitchen.

French fry coated hotdog


One thing that struck me about finding the French fry coated hot dog on a stick in South Korea was that they were doing it wrong, the sort of cultural misunderstanding that happens when one culture cooks the food of an unrelated and unattached culture and then impales said food on a wooden stick.

Firstly, the hot dog on a stick wasn’t coated in real American fries but chunks of potato and secondly, the hot dog batter was wheat flour rather than a more American corn dog batter. If Americans had have first cooked this one handed food, it would probably be a very different but equally deadly beast. So I set about cooking myself an American-style French fry coated hotdog. We recommend more here xnxx !

I cooked the French fries from scratch which is entirely un-American: feel free to use the frozen variety.

Ingredients:

One hotdog
One large russet burbank potato
Plenty of oil for deep frying

For the batter:

100gms of plain flour
75gms of cornmeal
1 egg
2 teaspoons of sugar
half a cup of milk

Method:

Russet Burbank Potato

Find yourself a russet burbank potato, about the length of a hotdog.

20080413_2249

Peel the potato then slice into french fries in a mandolin slicer (or do it by hand). Set aside.

Corndog batter

Mix together the dry batter ingredients, add the egg and the milk. Mix to a thick paste, adding more milk if it is too dry: you’re aiming at the batter being thick and sticky rather than runny like a real corn dog batter, slightly more viscous than a dough. Set aside.

20080413_2255

Fry the french fries in oil until golden. Remove from the oil onto a paper towel.

French fry coated hotdog

Coat the hotdog in the batter, then glue the french fries to the dog as best you can. Drop this monstrosity back into the boiling oil and fry until the french fries begin to brown.

French fry coated hotdog
Le Pogo et frites

Remove from the oil and poke a stick into it. Call your cardiologist to make preliminary enquiries about heart surgery. Enjoy.

And then with the leftovers, I cooked French fry coated bacon.

Making Bacon

Making Bacon

There is a descent into a darker realm when you begin cooking with a product labelled “CAUTION: Do not swallow”. The possibility of inadvertently killing your loved ones rises and your ability to rely on the way that a preparation tastes before cooking declines. The normal sensory cues that stop most sane people eating food that is deadly can no longer be relied upon. Things must be measured rather than guessed.

Sodium nitrite, the key to this particular charcuterie abyss, alone is not for human consumption. At least it says as much on the bag. But with it and a little pork belly, salt and sugar, you can free yourself from the hegemony of industrial bacon.

The Basic Bacon Cure
(from Ruhlman and Polcyn’s Charcuterie):

450gms of salt
225gms of sugar
50gms of pink salt (6.25% sodium nitrite; marketed as TCM, Instacure #1)

Method: Mix together thoroughly.

Buy one to two kilos of good pork belly. Lay about 50 grams of the cure onto a surface large enough for your piece of belly. Press all sides of the belly into the cure until it is covered with cure. Bag it into a zip-lock baggie, tag it with the date then refrigerate it for a week turning over every day.

Making Bacon

The wait is over. The belly firms up a little.

Making Bacon

Wash the cure and pork juice from the belly, pat dry, then roast for two hours at 100 degrees Celcius, by which time your house will smell like what I imagine the Sirens would have smelled like to the Argonauts, if Jason had have been in search of the Golden Ham. If it wasn’t nigh on impossible to buy a real American smoker in Australia, this stage would have been supplanted by a few hours over hickory smoke in the backyard. Damn Australian barbecue parochialism.

Making Bacon

Slice off the rind and eat it.

Apart from the possibility that my arteries would clog shut in mid-bite, I couldn’t think of any reason not to crunch away on it. Plus I have a congenital inability to discard anything that is remotely edible. The fact that it is crunchy and bubbling in the first place suggests that my oven is running much hotter than 100 degrees, so I may as well reap the only rewards of a faulty thermostat.

Making Bacon

Slice and fry to your heart’s continued malcontent. Your own bacon will be richer, juicier and thicker. More fat renders from it when cooked. It is texturally more dense and chewier than your store-bought fare. You’ll wonder how you were ever hoodwinked into buying the facsimile of bacon available in most stores and what other sad cuts of pork have been foisted upon you in the past.

How to make mayonnaise in 20 seconds

Why don’t marketers show you this when they sell immersion blenders? This is no Cuisinart or Braun, it’s the cheapest plastic model on the market.

The hours that I’ve wasted, whisk in one hand and slowly drizzling oil in the other, or more likely queuing with my sorry jar of Praise at a store. No more.

The world’s laziest mayonnaise recipe:

Prep time:
Total time:
Yield: 1 cup

Crack an egg into your immersion blender container. Don’t even bother to separate the yolk. Add two teaspoons of dijon mustard, a tablespoon of lemon juice, and a pinch of salt. Pour in 200ml of oil. I’m using canola because I’m being both cheap and lazy; if you’re neither of these things, spend some time researching the various olive oils and making tasting notes. Put hand blender to the very bottom of the container and blend until it thickens into mayonnaise.

Kimchi jeon (김치전)

kimchijeon ingredients

I’ve personally eaten half a kilo of kimchi this week. There have been no ill effects. Something about the idea of Korea’s national obsession being shot into space has piqued my tastebuds. Their mastery of the controlled fermentation of coleslaw is no longer earthbound.

A recipe for kimchi jeon is about the laziest that a recipe can be before it becomes a convenience food. If I described it as a kimchi pancake, then chances are that you could cook one just by guessing, even if you didn’t know kimchi from Lil’ Kim. There are four ingredients and if you’re reading this blog, I’ll bet that you already own three of them.

Ingredients:

100gms of plain flour
150gms of kimchi
2 eggs
100ml of water

Kimchijeon batter

Mix flour, eggs and water, stir through kimchi.

Kimchijeon

Fry on both sides, then cut into bite-size pieces.

Sausage Fancier

sausage fancier: urban garden

Once you’ve seen how sausages are made, you’ll want to eat nothing but sausages. This was my first impression of home sausage making; my second was that making sausages is possibly my true calling and that my university loan debts could have been better spent on a meat mincer and practicing the barbecuing arts rather than on undergraduate degrees.

I started with a setup familiar to all new converts to the testaments of sausage making: a copy of Michael Ruhlman and Brian Polcyn’s Charcuterie and George Foreman’s Lean Mean Meat Mincing Machine. That George Foreman lends his moniker to an electric meat mincer is no great surprise to me. I discovered years ago that Foreman had made not less than nine billion American dollars from selling a multitude of appliances in no way limited to the indoor grill. The hypocrisy of adding the word “Lean” to a product that should be pumping out sausages that should be about 25% fat is not lost in me.

If you’re looking to lose weight, eating pork fat stuffed into a tube is not your best option. I’m sure that George would argue that his Lean Mean Meat Mincing Machine means that the home sausage fancier could control the fat content in their sausages just like he himself took control of his 1971 battle with Joe Frazier in Kingston, Jamaica, but I’d rather be eating richer, fattier sausages in moderation than the fat-free simulacra of a sausage. Fat is vital for human survival, just like the footwork Foreman displayed in his 1987 fight with Steve Zouski.

My first batch was perfect. I followed Ruhlman’s basic garlic sausage recipe and added a tablespoon of roughly crushed cumin seeds, chilli flakes, Kampot pepper, then lowered the salt content. The Lean Mean Meat Mincing Machine shudders away. I achieved the “primary bind” that Ruhlman mentions; once ground, the meat turns sticky as the protein breaks down. The casein skin burst only once while stuffing.

sausage fancier

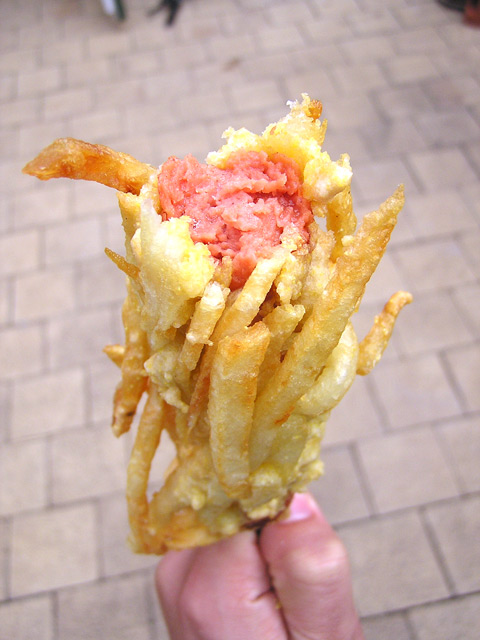
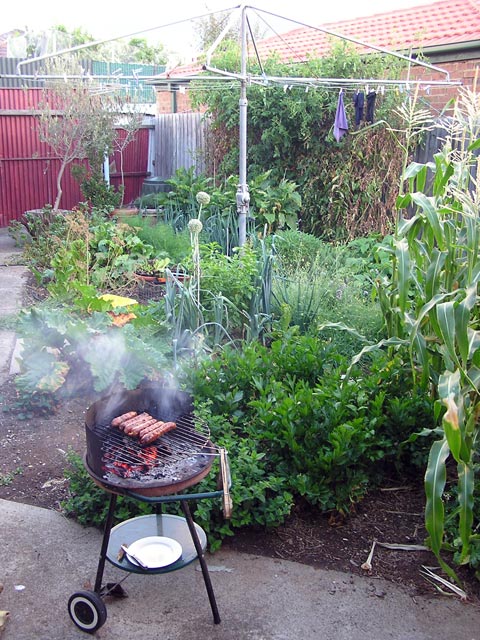
I grilled the sausages over charcoal as slowly as possible. I ate them with friends in absolute stunned silence.

I’ve begun eyeing off the greying cut-price meats in the supermarket refrigerators with a single question in mind: will it mince? What else can I stuff? What memories of sausages past can I recapture? How much of my life has been wasted not making my own sausages?

If there is one thing you can expect from this blog in the coming years, it is more sausage.

My basic garlic, cumin and pepper sausage recipe

(based on Michael Ruhlman and Brian Polcyn’s “Fresh Sausage Master Recipe: Fresh Garlic Sausage”)

Yields: about two and a half kilograms of sausages.

The original Ruhlman/Polcyn recipe calls for 3 tablespoons of salt. I ground in two tablespoons of this and fried up a patty of the mince to test the flavour before stuffing the casings. For me, it was salty enough but add more or less to your taste. Real intestine casings are tough to find in Australia. I went with casein.

Ingredients:

1 tablespoon of cumin seeds, coarsely ground
1 teaspoon of dried chilli flakes
1 tablespoon of Kampot pepper (or the best quality black pepper you can get), coarsely ground.
2 tablespoons of the cheapest salt available*.
3 tablespoons of minced garlic
2 cups of white wine
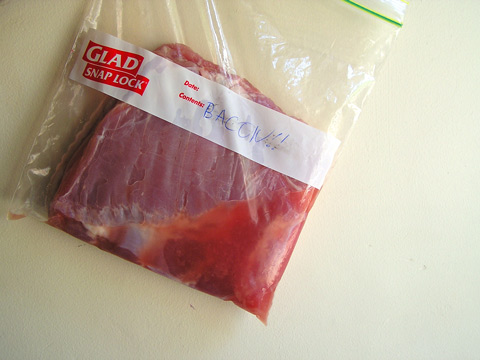
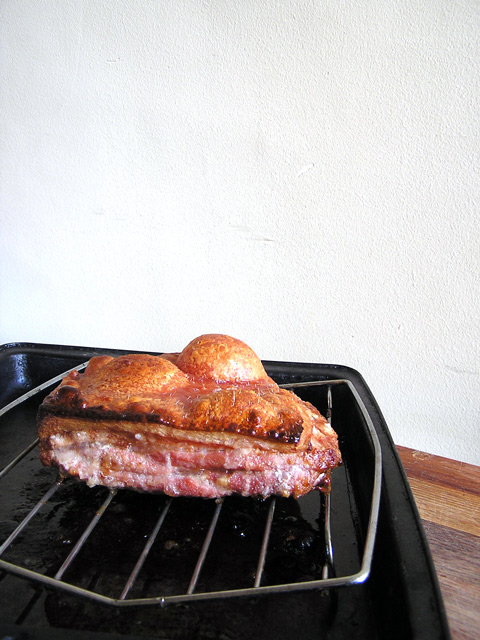
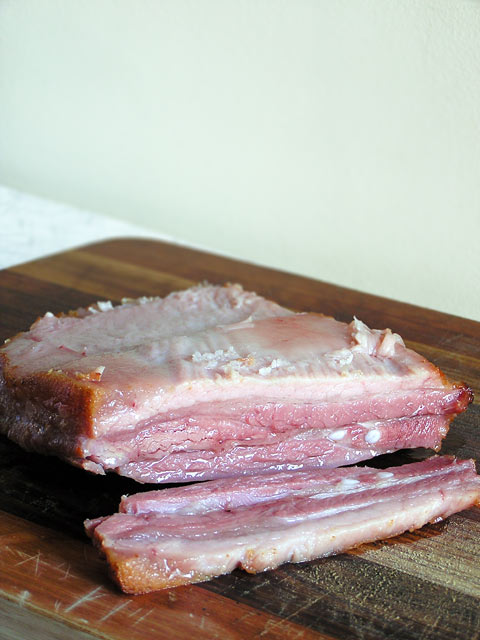
2.5 kilograms of fatty pork meat (approx 25% fat. I used 2 kilos of shoulder to 0.5 kilo of belly)

Method:

Pound the cumin, pepper and chilli flakes in a mortar and pestle until most of the cumin seeds are broken. Finely chop the garlic. Chop the meat into pieces small enough to fit into your mincer. Mix meat, spices and salt together in a bowl and refrigerate for at least two hours.

Soak casein casings in one cup of white wine.

Mince all ingredients into a bowl set in ice, on the fine (0.25cm) grade. Add one cup of wine and mix the mince until it becomes sticky. Fry up a patty of meat to test flavouring, then adjust anything to taste.

Change mincer to stuffer attachments. Thread about a metre of casings over attachment and tie the end in a knot. Pour mince into mincer and stuff away!

Section the giant sausage into odd lengths by twisting the casings – it is much easier to make one metre-long sausage and do this at the end of the process rather than juggling the sausage and the mincer. Charcuterie has a twee picture of measuring a sausage with a ruler as to ensure uniform size; my approach is less anal but equally obscene. Cook over a fire, as slowly as you can bear.

For a much more pictorial recipe, buy Ruhlman and Polcyn’s Charcuterie: The Craft of Salting, Smoking, and Curing.

* – Expensive salt makes no difference when dissolved in food, especially in sausages such as these which are packed with other aromatic components. Jeffrey Steingarten tests this out in It Must Have Been Something I Ate.